Documenting MagAO-X
Where the documentation lives
This source code for this documentation lives in the magao-x/handbook repository. Parts of the documentation pertaining to the core C++ code are generated from the code in magao-x/MagAOX, which is documented in Doxygen.
The built copy of this documentation is hosted at
https://magao-x.org/docs/handbook/. When changes are pushed to the
main branch of
magao-x/handbook, a workflow runs in GitHub Actions to update the copy on magao-x.org.
How to make changes: in brief (e.g. for typo corrections)
If you need to make an edit on the fly, without installing any software, it is best to simply edit the file directly on GitHub.
Go to https://github.com/magao-x/handbook and browse to the source for the document you want to edit (e.g. this document)
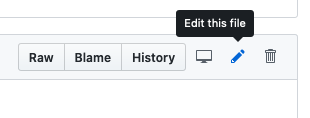
Click the pencil icon
If you are allowed to edit directly, you will see this:
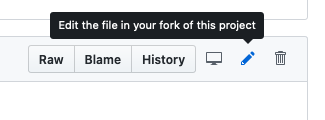
If not, you will instead see this:
Make your changes, optionally previewing them with the “Preview changes” tab
Scroll down to the “Commit changes” or “Propose changes” form (below the main editor) and fill in a brief description of what you changed.
Click “Commit changes” or “Propose change”
If you committed directly, your changes will be live in a minute or two. If you proposed a change, someone else will have to merge it first.
How to make bigger changes
Installing the required software
You will need Python 3.5 or newer (with pip) and a recent version of
git.
Clone https://github.com/magao-x/handbook to your own computer
# full clone
$ git clone https://github.com/magao-x/handbook.git

# shallow clone (faster)
$ git clone --depth=1 https://github.com/magao-x/handbook.git
Change into the directory where you just cloned the documentation and install software so you can preview your changes.
cd handbook/

# if 'pip' and 'python' are provided by Python 3.x:
$ pip install --user -r requirements.txt

# if your OS calls pip for Python 3.x 'pip3':
$ pip3 install --user -r requirements.txt
(Installing Python 3 is outside the scope of this document, but Anaconda is a popular installer.)
Note: on Ubuntu 24 you can instead run this command:
$ sudo apt install python3-sphinx python3-sphinx-rtd-theme
Ensure
sphinx-buildis on the path by runningwhich sphinx-buildat the prompt$ which sphinx-build /Users/jlong/miniconda3/bin/sphinx-build
(If you’re using your OS-provided Python, and don’t see anything output when you run
which sphinx-build, you should make sure$HOME/.local/binis on$PATH.)
You now have a copy of the sources for the handbook. If you’re just editing an existing document, skip ahead.
Installing for windows
Download and Install Git Bash. Git Bash is an application for Windows that emulates a Unix command line environment for Git
Download and Install Anaconda.
In order for
pip installand python to work properly in Git Bash from the previous section, you must open the PowerShell and run this command:source /c/Path/to/anaconda3/Scripts/activate. You should now be able to restart Git Bash and successfully runpip.You will then need to generate a ssh key pair. To generate a public/private key pair run
ssh-keygen -t ed25519in Git Bash.A key fingerprint will be generated. This will need to be copied and pasted in your github account under ‘Settings’ -> ‘SSH and GPG keys’. Click ‘New SSH key’ and paste the key fingerprint under key. Click ‘Add SSH key’.
Back in Git Bash, you will need to run the command:
ssh -T git@github.comto test the connection. If everything is done correctly, it will tell you it has been successfully authenticated. If it states permission denied, you need to ensure everything is correctly set up. If errors persist, try deleting the keys, generate a new pair, and try again.
Creating a brand new document
Create a new plain text file with the name you want and the extension
.rstfor reStructuredText (see Markup)Open the
index.rstfile in the folder for the section you’re adding to and find the.. toctree::. Add the base name of your file to the list that follows (e.g.funny-business.rstwould be calledfunny-businessin the toctree)
Edit and publish
Finally, to preview and publish your edits:
Edit the document you want to change
Run
make html(in the directory you cloned into)Open
_build/html/index.htmlto see the updated site, and verify your changes look goodgit add ./path/to/file/you/changed.rstandgit commit -m "Description of your changes"git push origin main
If everything looks good, the public copy of the docs will update automatically!
Markup
New documentation should be written in reStructuredText, the native markup format of the Sphinx documentation tool (abbreviated “reST”). The rest of this section contains a cheat sheet for common things you may need to write your document, but you can also consult the primer and the docutils documentation for more advanced topics.
If you want to see how a particular bit of formatting was achieved, you can click the “Page source” link at the bottom of any page.
Headings and paragraphs
Paragraphs are separated with a blank line. reST follows a somewhat mysterious process to infer hierarchy from headings. Each heading
is followed by a line of the same length, made up of a punctuation character like = or ~.
When editing an existing document, use the other headings in it as a guide to which punctuation character to use for consistency.
Markup:
Example heading
"""""""""""""""

Body paragraph text

Subheading
^^^^^^^^^^

Body paragraph number 2
Output:
Example heading
Body paragraph text
Subheading
Body paragraph number 2
Outside links
Plain URLs are linkified automatically, but you can customize the link text if you want.
Markup:
`reStructuredText <http://www.sphinx-doc.org/en/stable/usage/restructuredtext/basics.html>`_

http://www.sphinx-doc.org/en/stable/usage/restructuredtext/basics.html
Output:
http://www.sphinx-doc.org/en/stable/usage/restructuredtext/basics.html
Other handbook documents
Links within the handbook use document names (without file extensions).
:doc:`../operating/index`

:doc:`Operating section <../operating/index>`

:doc:`/operating/index`

:doc:`Operating section </operating/index>`
Output:
Operation of the MagAO-X instrument
Glossary of terms
The Glossary of terms lives in appendices/glossary.rst. Add terms there following the
same format, and then reference them as follows anywhere else in the docs.
When you want the link text to be different from the term as given in the glossary (e.g. to make it plural), you can put the term as spelled in the glossary within angle brackets.
Markup:
Maybe you will be the great physicist to discover the meaning
of :term:`shmims <shmim>`! Also, what does :term:`RON` mean?
Output:
Maybe you will be the great physicist to discover the meaning of shmims! Also, what does RON mean?
Internal references
Internal references require a target, indicated with .. _label-goes-here:
preceding a heading, like so:
Markup:
.. _my-label-name:

Example heading reference
"""""""""""""""""""""""""

Example paragraph
Output:
Example heading reference
Example paragraph
Now you can link to a particular heading using its label and :ref:
Markup:
Read about it in :ref:`my-label-name` or :ref:`see previous section <my-label-name>`
Output:
Read about it in Example heading reference or see previous section
Inline code
To include some code inline, enclose it in double backticks (left of the 1
key on most US keyboards).
Example markup:
Before starting, execute ``sudo do-things`` in your terminal
Output:
Before starting, execute sudo do-things in your terminal
Blocks of code
Markup:
.. code-block:: rest

   Example :ref:`markup`

.. code-block::

def example():
   return f'Example {python}'

.. code-block:: bash

   export EXAMPLE="$EXAMPLE:bash/shell/script/"
Note that the language follows the ::, and Python is the default.
Output:
Example :ref:`markup`
def example():
   return f'Example {python}'
export EXAMPLE="$EXAMPLE:bash/shell/script/"
Math
Equations can be inserted as a special variety of code block.
Markup:
.. math::

   \mu = m - M = 5 \log_{10}\left(\frac{d}{10\,\mathrm{pc}}\right)
Output:
Static files
This handbook uses a custom :static: role to handle including certain
data files in the web version.
The example shows a link to
_static/ref/filters/magaox_sci1-ch4_bs-65-35_scibs-5050.dat (view on GitHub), which
will get copied to
https://magao-x.org/docs/handbook/_static/ref/filters/magaox_sci1-ch4_bs-65-35_scibs-5050.dat on publication.
(You could use a full URL and the normal link syntax, but the link would only work after publication and you couldn’t preview.)
Markup:
:static:`Click here to download some filter curve <ref/filters/magaox_sci1-ch4_bs-65-35_scibs-5050.dat>`
Output:
Downloadable files
Downloadable files are similar to static files, but the filename is
given relative to the current document. For instance, if you wanted
to make a download link to the mini-star.png image in this folder:
Markup:
:download:`Click here to download the star logo <mini-star.png>`
Output:
Images
By default, images are included inline and left aligned.
Markup:
.. image:: mini-star.png
   :alt: Mini star logo

.. image:: mini-star.png
   :alt: Mini star logo (click to go home)
   :align: right
   :scale: 50%
Output:
