Unpacking The MagAO-X Table at LCO
This procedure describes how to unpack the MagAO-X instrument table at LCO.
Estimated Time to Complete: 4 hrs
This document can be downloaded as a PDF: Instrument Unpacking at LCO
Initial Conditions
The instrument box is unloaded at LCO
Cleanroom “unpacking room” is clear
Preparations
ensure that the cart/lifting-fixture is ready to be assembled, with all hardware in hand
ensure that the 2x 2-wire lifting harnesses are present
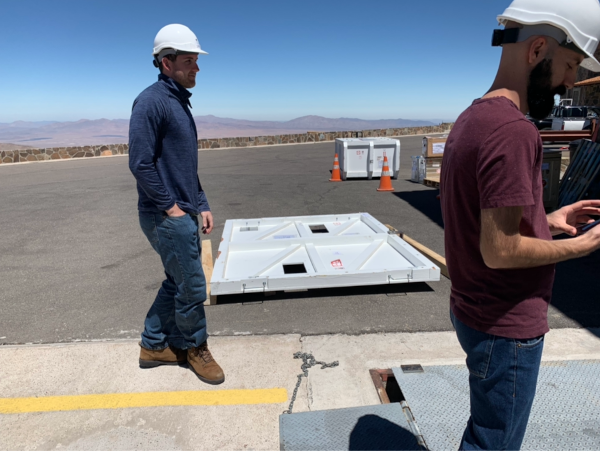
At least 5 personnel are needed. All should have appropriate PPE (hard hats and safety shoes)
find a crane scale good for at least 2500 lbs.
If the legs will be used, make sure the 3 geophones (blue cables) are untangled in the basket and can reach their respective legs (see number and letter markings)
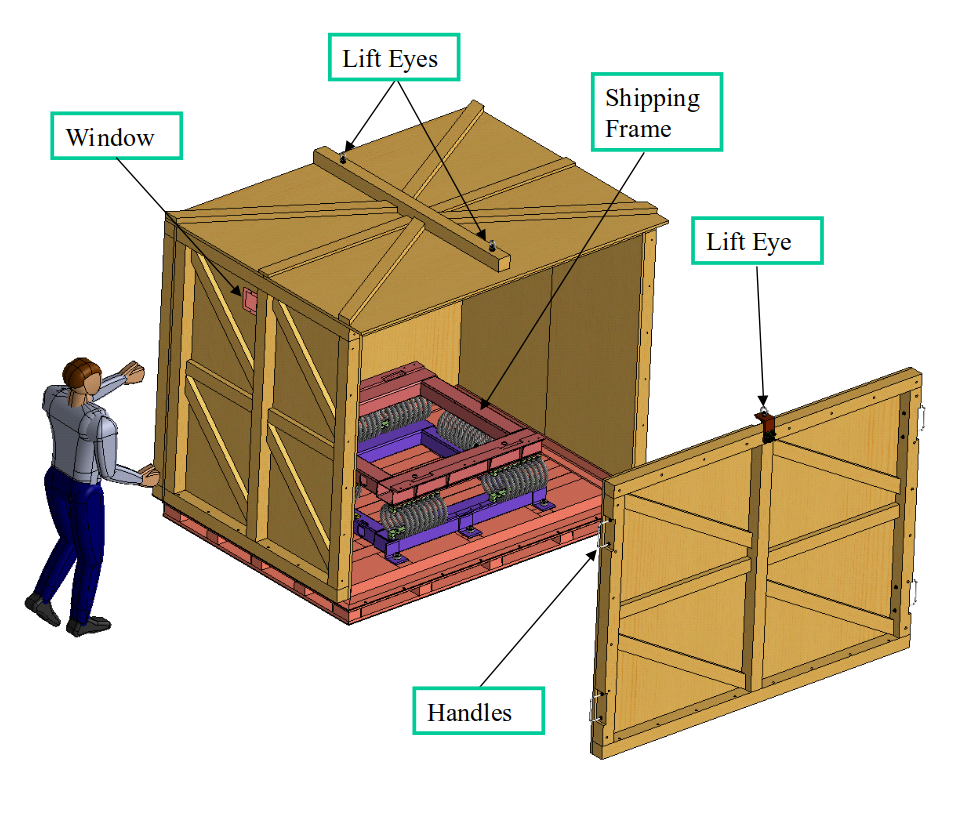
Illustration of the instrument table shipping system
Open The Box
Place the large box with the optical bench in the unpacking area, setting it down on 4 furniture dollies as shown.
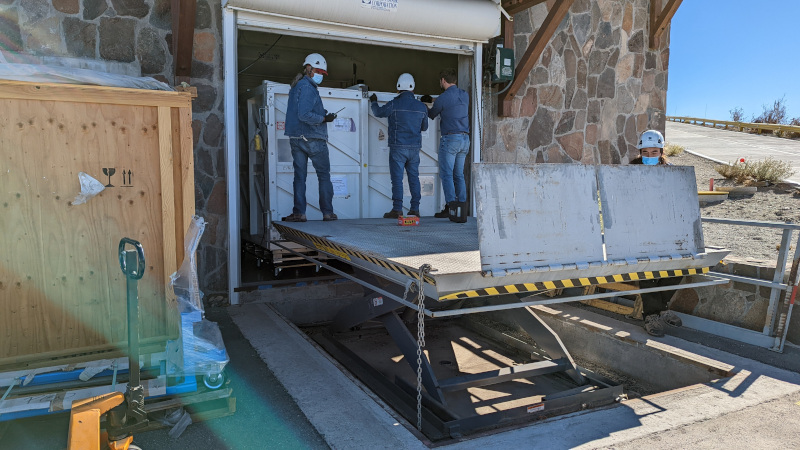
Note: Use caution when first driving on to the pentalift as the lift will settle under the weight.
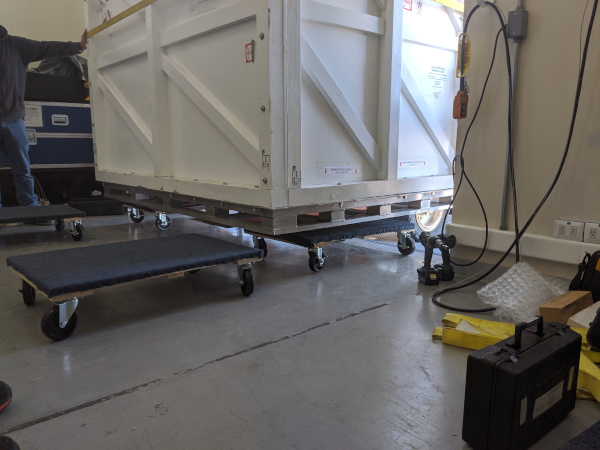
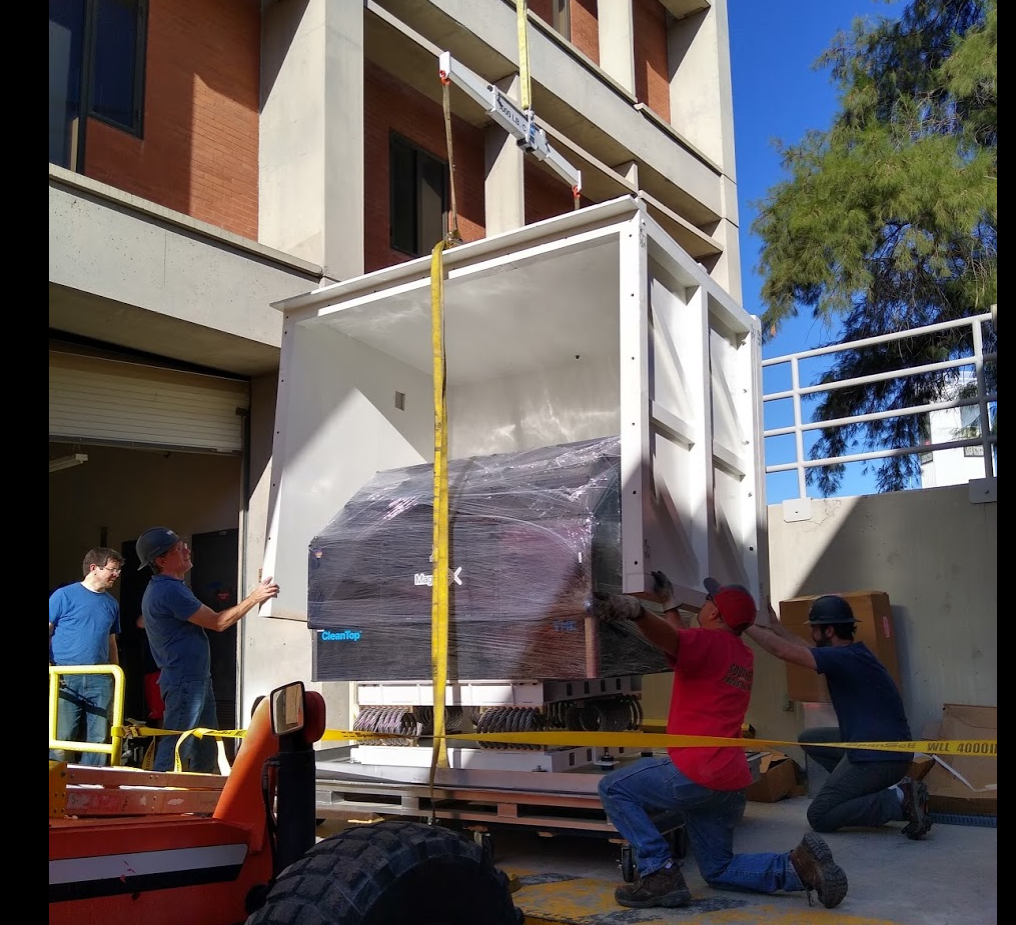
Using the forklift to set the box down on 4 furniture dollies
Note: the removable side wall should be facing towards the outer garage door
Using the forklift to set the box down on 4 furniture dollies
Install the handles on the removable side panel in the outward direction (they are stowed inward for shipping)
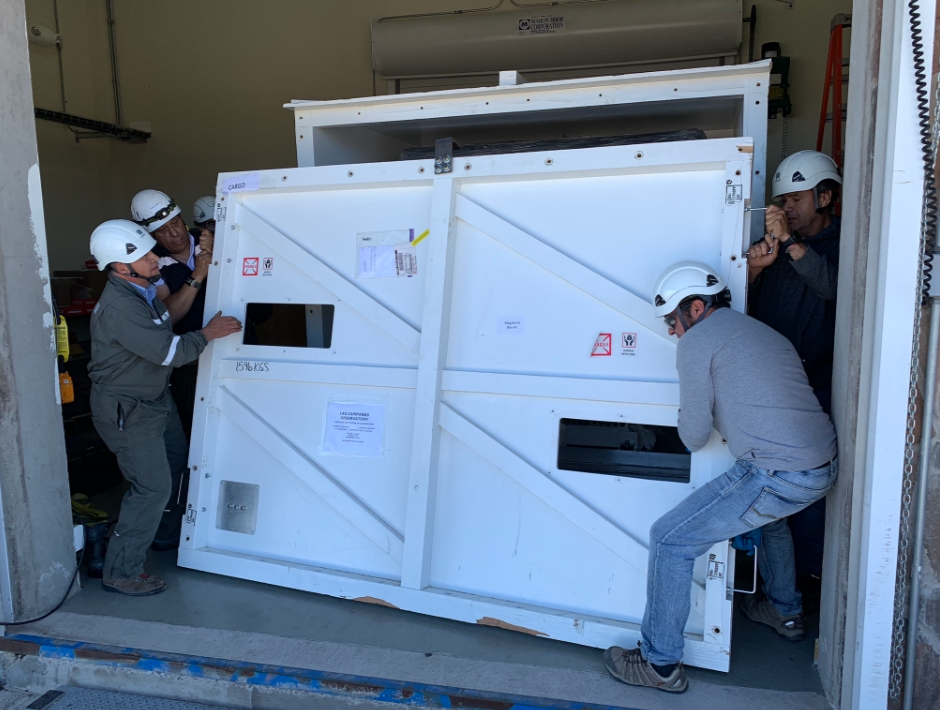
Remove all but two bolts from the side panel. The pentalift can be used to access the upper bolts as shown.
Using the pentalift to access the upper bolts on the door
With 4 workers standing by to handle the panel, remove the final bolts. The panel fits very snugly so it should not fall out on its on.
Remove the side panel. This takes 4 workers.
Removal of the front panel
Set the side panel out of the way outside
The front panel temporarily stored outside
Conduct initial inspection of the instrument, including drop-n-tells. Remove the data recorders (this may have been done via the inspection ports already)
Rotate the box on dollies 180 degrees so the opening faces into the cleanroom
Remove all bolts attaching the box top to the aluminum pallet. Store in a safe place.
Install the lifting eyes on the box lid, and attach the load spreader the box lid as shown. The load spread should be adjusted to nearly one end (mark the spot!)

The lifting fixture attached to the lid
Stage 4x furniture dollies to set the lid on, between the pallet and the outer garage door.
Open the inner garage door

Ready to lift the lid
Position a worker at each corner to guid the lid
Lift the lid with the crane, with the 4 corner guides ensuring that it goes straight up.
Lifting the lid. Note it does not need to go this high at LCO
Once the lid is safely clear of the palette lip, move the palette on its dollies into the cleanroom
Moving the instrument on the pallet into the cleanroom temporarily
Close the inner door behind it.
CAUTION: Do not have both garage doors open at the same time.
Set the lid on the remaining 4 dollies
Detach the load spreader from the lid, fine to leave it attached to the crane.
Rotate the lid 180 degrees, and move it outside via the lift gate.
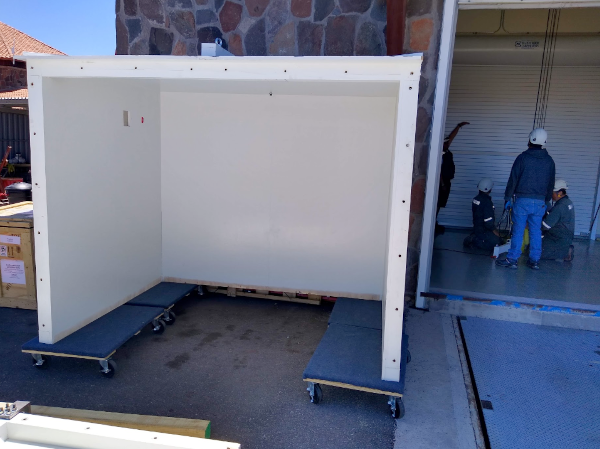
The lid stored outside
Shut the outer door
Open the inner door
Move the pallet back into the unpacking room
Leave the inner door open to provide enough space for the next steps.
Remove the Table from the Frame
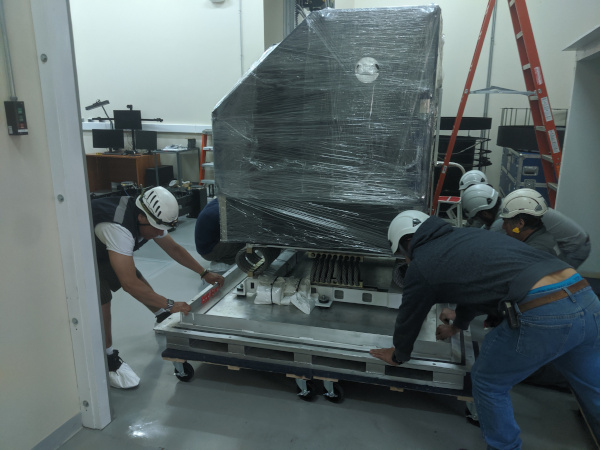
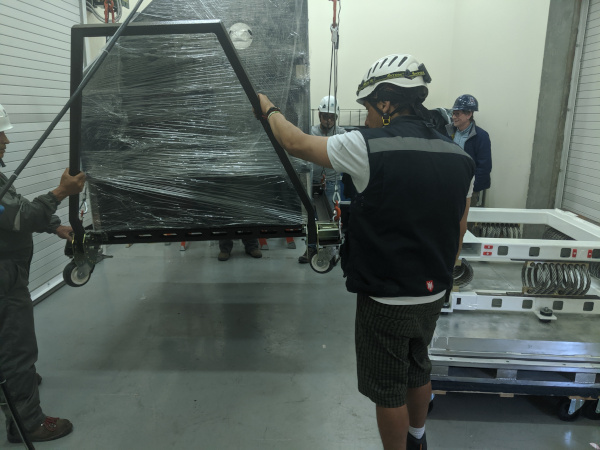
Assemble the cart around the shipping frame on the pallet.
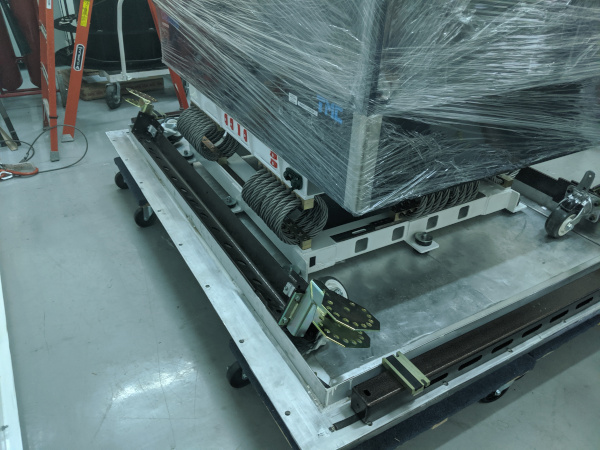
The cart is assembled on the pallet around the instrument. This shows it in progress.
NOTE: The cart parts are labeled with A B C D, and they should be oriented to match the table.
Attach the 2x 2-wire lifting harnasses to the cart, and then to the load-spreader (which should still be on the crane)
Reposition the load spreader to the cart position
slowly Lift the cart up to the bottom of the table
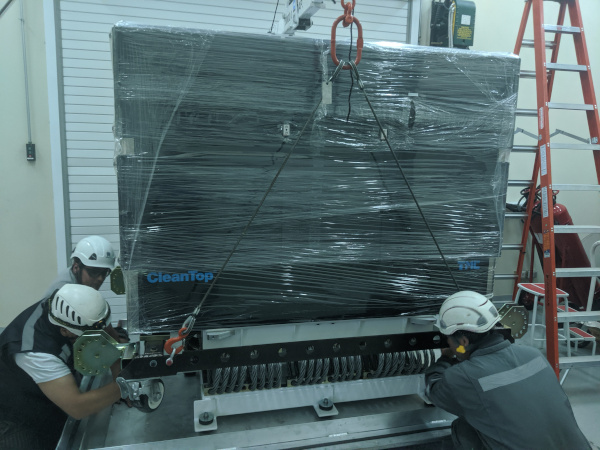
The cart is been lifted off the pallet to the instrument.
CAUTION: guide the cart around the wire springs.
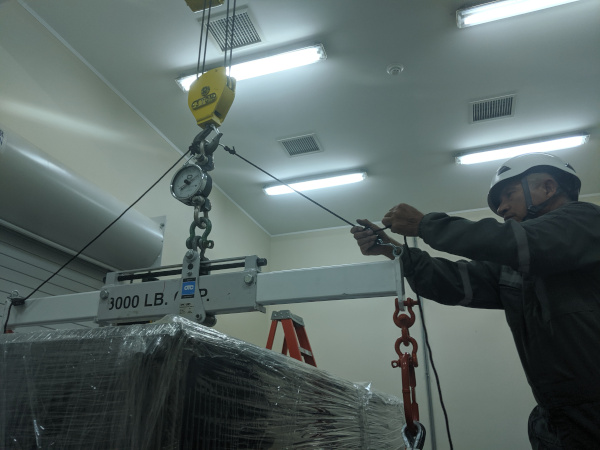
While the cart is suspended, note its weight on the scale.
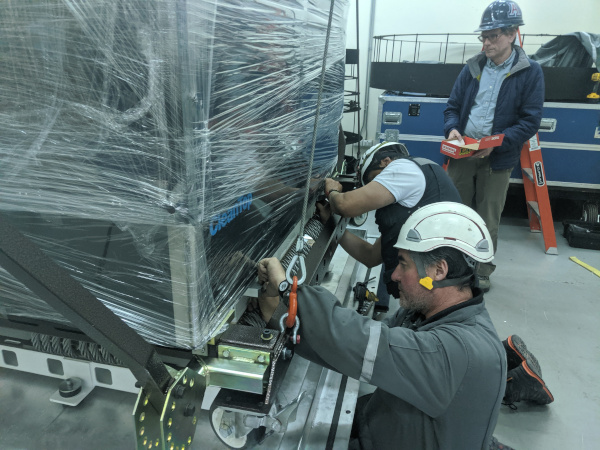
Loosely install 2 outboard bolts (through the thick brackets) to the bottom of the table.
NOTE: it may be necessary to loosen some of the cart bolts
Using those bolts as guides, raise the cart until all 4 bolts can be installed
Tighten the 4 bolts
Tighten all cart bolts
Remove the bolts holding the table to the shipping frame, collecting them in a box for later.
Removing the shipping frame bolts.
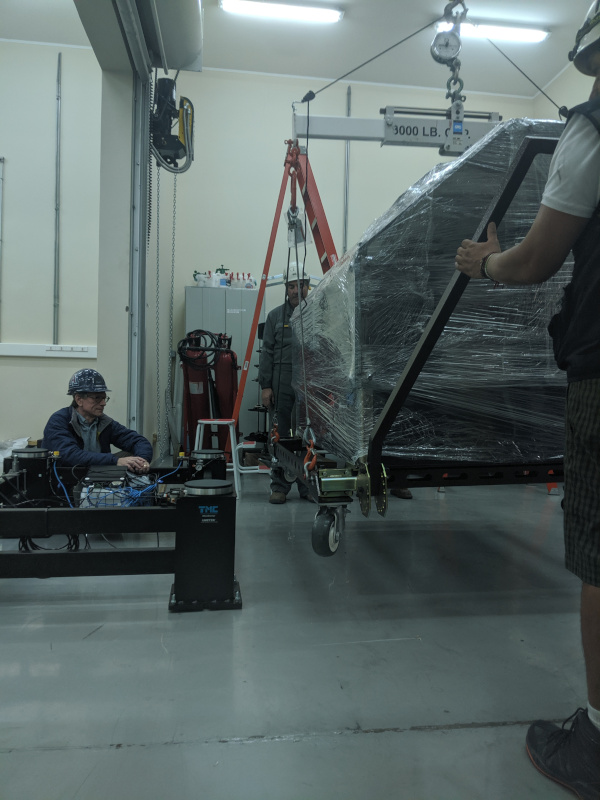
Adjust the load spreader to the table position
Attach the load balancing ropes to form a triangle above the load spreader.
The load spreader is adjusted, and the load balancing ropes are being snugged.
If not done, install the pusher bar cart handles
Station workers on each end, to use the cart handles to guide the load
Slowly lift the instrument off the shipping frame
Being careful to not tip the instrument, move the pallet out from under it towards the outside door.
Once the table is off the pallet, it is moved out from under.
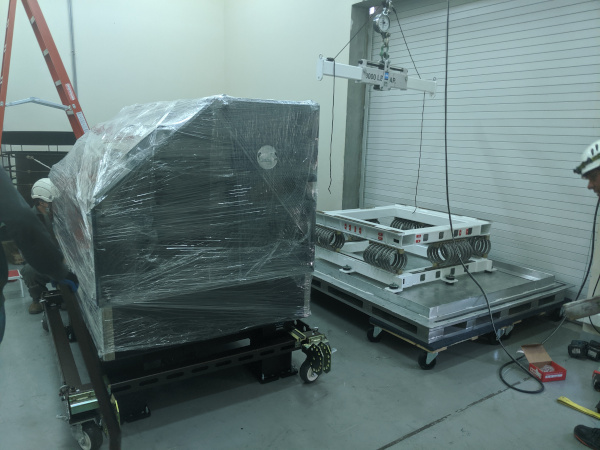
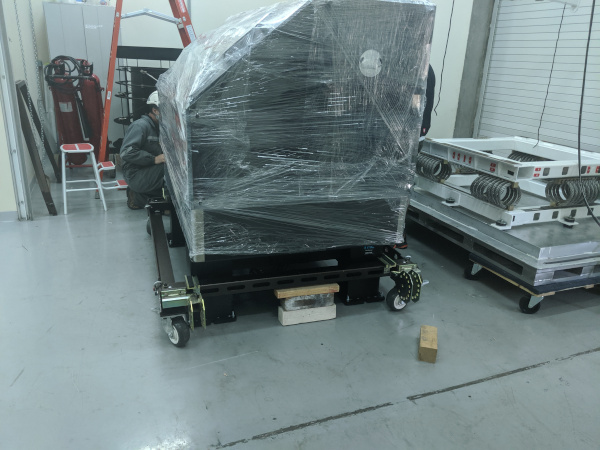
If not using the legs now, gently set the cart down on the floor.
Remove the Cart from the Table on the Legs
If not already done, lift the cart+table off the floor with the crane
Center the platters on the legs
Orient the legs so that the letters align with those on the table (A=A, B=B, etc.)
Wheel the legs under the table and lower it. Alignment is not critical in the cleanroom, but try to center it.
The legs are wheeled under the table.
Maintain 320 lbs (or the weight noted above) of pre-load on the crane
Remove the 4 bolts attaching the cart to the table
lower the cart with the crane to the floor
The cart has been detached from the table, which is now on the legs.
Place wood blocks under the short sides of the cart, and then remove the side of the cart along the clean room side
Using blocks to disassemble the cart.
Wheel the instrument on the legs into the clean room.
Optional: reassemble the cart, and wheel it into the cleanroom.
Otherwise, stow the cart pieces out of the way.
Reassemble the shipping box
Bring the lid back inside
Orient the pallet correctly (heavy side springs go toward back of lid)
Use the crane to install the lid on the pallet
Bolt it down
Install the removable side panel.
Forklift the box out of the unpacking room.