Alignment
These procedures assume that you have completed the System Startup and Daily Startup. In other words, CACAO is configured, you have a PSF
on camtip, and you are modulating.
System Pupil Alignment
This procedure will align the pupils on dmtweeter, dmncpc, and camwfs. Things to remember:
ttmpupilis used to align the system pupil ondmtweeter. We use the actuators ondmtweeteras the reference (the F-Test).ttmpupil moves the image of M1 in every pupil-plane inside MagAO-X, including dmwoofer, dmtweeter, on the modulator, camwfs, fwpupil (and the very nearby dmncpc), fwlyot, and as reimaged on camsci1.
We use ttmperi to align the pupil in the coronagraph using dmncpc actuators as a reference (the J-test).
However, ttmperi moves the pupil image for all of the lower bench. Thus it is important to remember that you are also moving the pupil on camwfs with ttmperi during the J-Test, which can affect loop stability.
The camera lens, which consists of stagecamlensx and stagecamlensy, moves the pupils on camwfs. The primary purpose of this is to register the dmtweeter actuators with the camwfs pixels.
However, on-sky we use the position of the camwfs pupils to control ttmpupil to keep the system pupil aligned as the K-mirror rotates. This only works under the assumption that the actuators are aligned to the pixels first.
In the lab moving ttmpupil to fix camwfs pupil positions mis-registers the actuators w.r.t. the camwfs pixels. So the Pupil Tracking Loop must NOT be used in lab mode.
Decide on your beam splitter
All of the alignment uses cameras downstream of the stagebs science/WFS beamsplitter, and changing beamsplitter causes shifts in both the pupil and focal plane. Thus a change of beamsplitter will invalidate your alignment and require you to repeat these steps.
Decide whether you’re using H-alpha / IR or 65-35 first, and configure stagebs.
Pupil Alignment
This is the main pupil alignment procedure which should be followed after starting up, or after switching beam splitters. The individual F-Test, J-Test, and camwfs alignments are performed when needed as part of this, and are described below.
Put
camsci1into pupil. You will likely observe that the pupil is not round.Move ttmpupil until the pupil on
camsci1appears round.
- Now test to make sure that the HOloop is working properly by setting the HOloop gains to 0 and closing the loop.
You should see a process appear in the CACAO milk-procCTRL window, titled
mvalC2dm-1. Ensure that the numbers underloopcnt(to the right ofmvalC2dm-1) are increasing.
Warning
If you do not see a mvalC2dm-1 process appear or the numbers next to loopcnt are not increasing, stop and ask Jared (TODO: come up with troubleshooting solution for this step).
Now close the HOloop on the first 24 modes and set wooder offloading to 4 modes.
Keeping the loop closed, you can now start Auto Alignment of the
ttmpupilandcameralensx/cameralensydevicesBefore you click Start, make sure you are monitoring the
camwfspupil position (and thecamwfsviewer) to ensure it does not run away. This will happen immediately and aggressively.If they do run away, Stop the auto alignment. You may need to use Loop Zero on the loop control GUI and the Zero button on the Offloading Ctrl GUI to remove spurious tip-tilt corrections.
Monitor “Pupil Tracking Loop” and “Actuator Alignment Loop” deltas.
Warning
If you don’t see the alignment pokes in the camwfs frames, stop Auto Alignment immediately. This is likely because the
dmtweeterapp has died, and is not sending signals. Your pupils will run away. Other things to check: Do you have a good dark oncamwfs? Doescamwfsneed to be reconfigured? Does the F-test look ok?
After the loop deltas have begun decreasing, close on 288 modes and set offloading to 10 modes.
Once the loops have converged (“Pupil Tracking Loop” and “Actuator Alignment Loop” deltas less than 0.05 in the lab), you can turn off woofer-offloading.
With Auto Alignment still running, align the beam on the NCPC DM using the J-test <jtest>`and ``ttmperi` (details below).
Once the loops have converged (“Pupil Tracking Loop” and “Actuator Alignment Loop” deltas less than 0.05 in the lab) stop the Auto Alignment loop.
In the lab the Pupil Tracking Loop should turn off when you stop the Auto Alignment loop.
On sky the Pupil Tracking Loop should remain on when you stop the Auto Alignment loop.
Now, close the loop on the rest of the modes.
You may now turn on the Auto Alignment loop again. This should re-align the Pyramid pupils post-J-test.
Now, open the loop and increase the flux on camwfs: - Put in flipwfsf - Adjust fwtelsim and camwfs EM gain as needed to achieve at least 1-2000 counts on camwfs.
you may need to reset protection
take a camwfs dark and then re-close the loop.
If using
camflowfs:put fwfpm in knifemask
put
camflowfsin default ROI, and press t to show the target cross on its display.Open the
camflowfsshutter. If you do not see a PSF oncamflowfs:If you have already completed the alignment successfully, but are now switching beamsplitters: use the drop-down box to select the new beamsplitter.
Warning
Do not use the drop-down unless you are sure that you need to. This is a relative move equivalent to hitting the arrow keys many times. It is not an absolute move to a setpoint. Do not use this to troubleshoot!
camsci1has a wider FOV. Make sure fwscind is not in pupil, move fwfpm to open, then use camsci1 to find the spot.If you can see it on camsci, use pico sci-x to move the spot to roughly centered on camsci1, then return to camflowfs.
If you do not see the spot on either camflowfs or camsci1 then something is wrong. Check all filter wheel and stage positions, ensure shutters are responding and open.
On Pupil Alignment Gui use the pico sci-x buttons to move the PSF left and right to center on the target
See above warning regarding using the drop-down selection for changing beamsplitters.
Use the arrow buttons to move, changing the scale for finer control
The PSF should be centered on the target along x in the camflowfs display
- # Then, select the
modttmoption in the “Tip Alignment” section of the Pupil Alignment GUI Use the arrow buttons under
modttmto move the PSF up and down such that the PSF is centered along y
If not using
camflowfs(i.e. usingcamsci1to align):Set
camsci1to the full ROITake a dark and then open the
camsci1shutterEnsure
fwscindis not inpupil, movefwfpmtoopen, then find the spot in thecamsci1imageIf you cannot see a PSF, something is wrong upstream. Check upstream filters and stage positions, shutters, etc.
On Pupil Alignment Gui use the pico sci-x buttons to approximately center the PSF on
camsci1
You may now proceed to FDPR (below).
Tweeter Pupil Alignment (F-Test)
This does not need to be done if you have performed the Auto Alignment, however it is usually good to check it to make sure the automatic loop has converged properly.
Note
If you modify the F-Test by actuating ttmpupil, you will need to re-do both the J-Test and the camwfs pupil alignments.
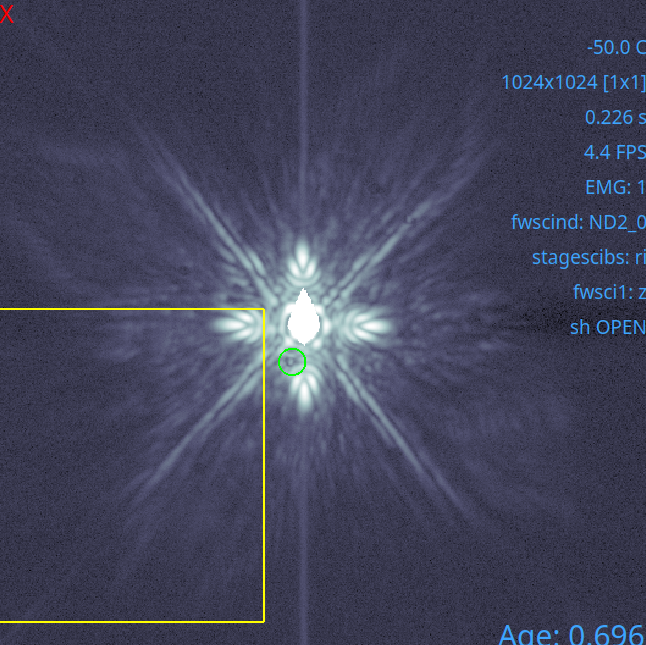
To manually align the pupil on the tweeter, we perform the F-Test (which is now actually an R).
fwpupil to open (in Coronagraph Alignment GUI)
fwfpm to open
fwlyot to open
fwscind to pupil (in camsci1Ctrl)
fwsci1 to z
configure camsci1 so that you can see the pupil without saturating.
Move stagesci1 to preset fpm.
If necessary, use the “Loop Zero” buttons to remove any leftover AO corrections.
Now put the test pattern on the tweeter with Pupil Alignment GUI for dmtweeter. Press the set test under Tweeter
Next, use the “TTM Pupil” section to align the pupil on the tweeter using the arrow keypad. The following figure demonstrates what a good alignment looks like.
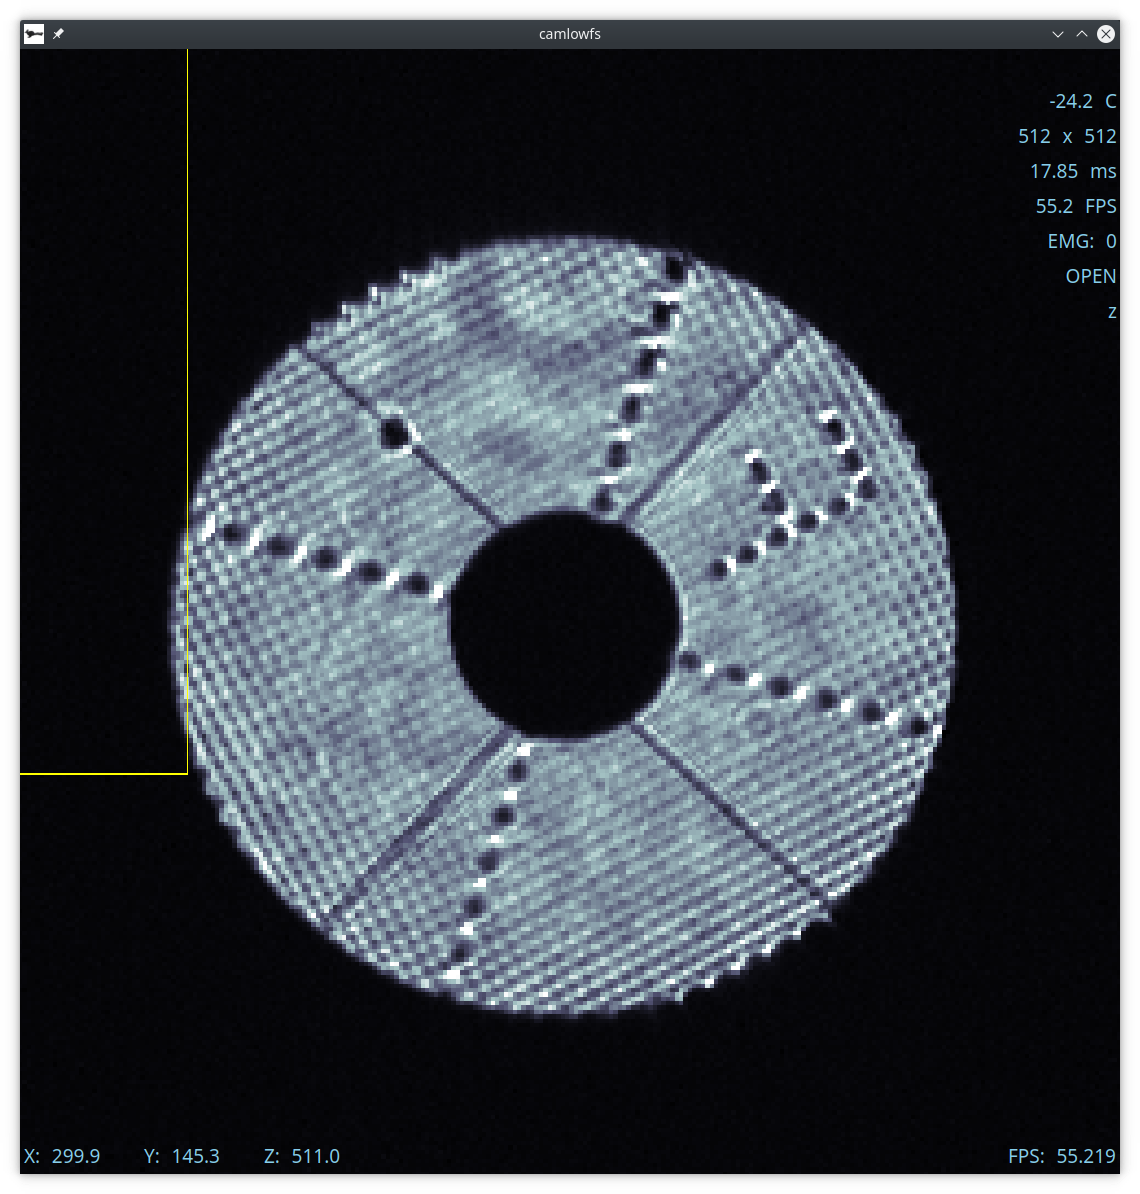
When done, use the Tweeter zero test button on the Alignment GUI.
Decide on your beam splitter
The J-test and later alignment takes place downstream of the stagebs science/WFS beamsplitter, so a change of beamsplitter will invalidate your alignment and require you to repeat those steps.
Decide whether you’re using H-alpha / IR or 65-35 first, and configure stagebs.
NCPC Pupil Alignment (J-Test)
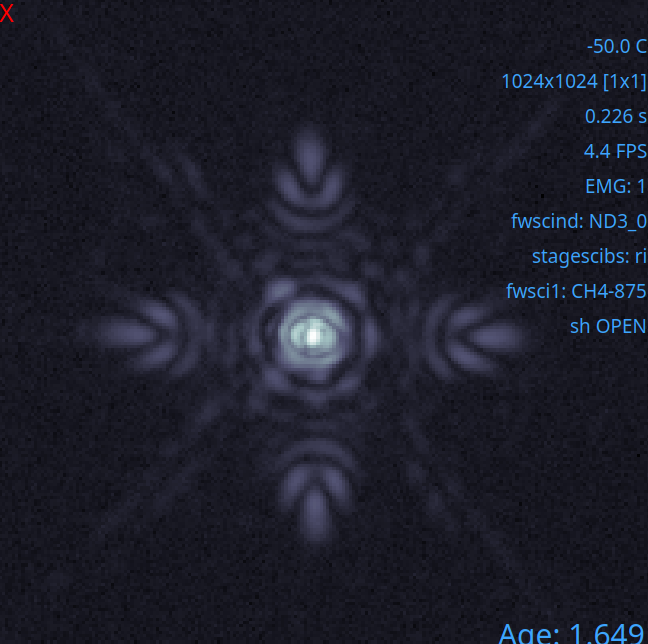
To align the pupil on dmncpc, we perform the J-Test.
Note
ttmperi moves the pupil on the lower bench, including on camwfs.
This means adjusting the position on dmncpc with the AO loop closed can cause instability, even though dmncpc itself is downstream.
Note
If aligning manually, follow the steps in f_test F-Test (above) first, as this changes the position downstream. The J-Test should only be performed after the F-Test is complete.
The system should be configured for the F-test above (in particular, check that fwscind is in pupil). After completing the steps above,
Auto Alignment should be active and converged. Keep it active while you do this stage of the alignment.
Next,
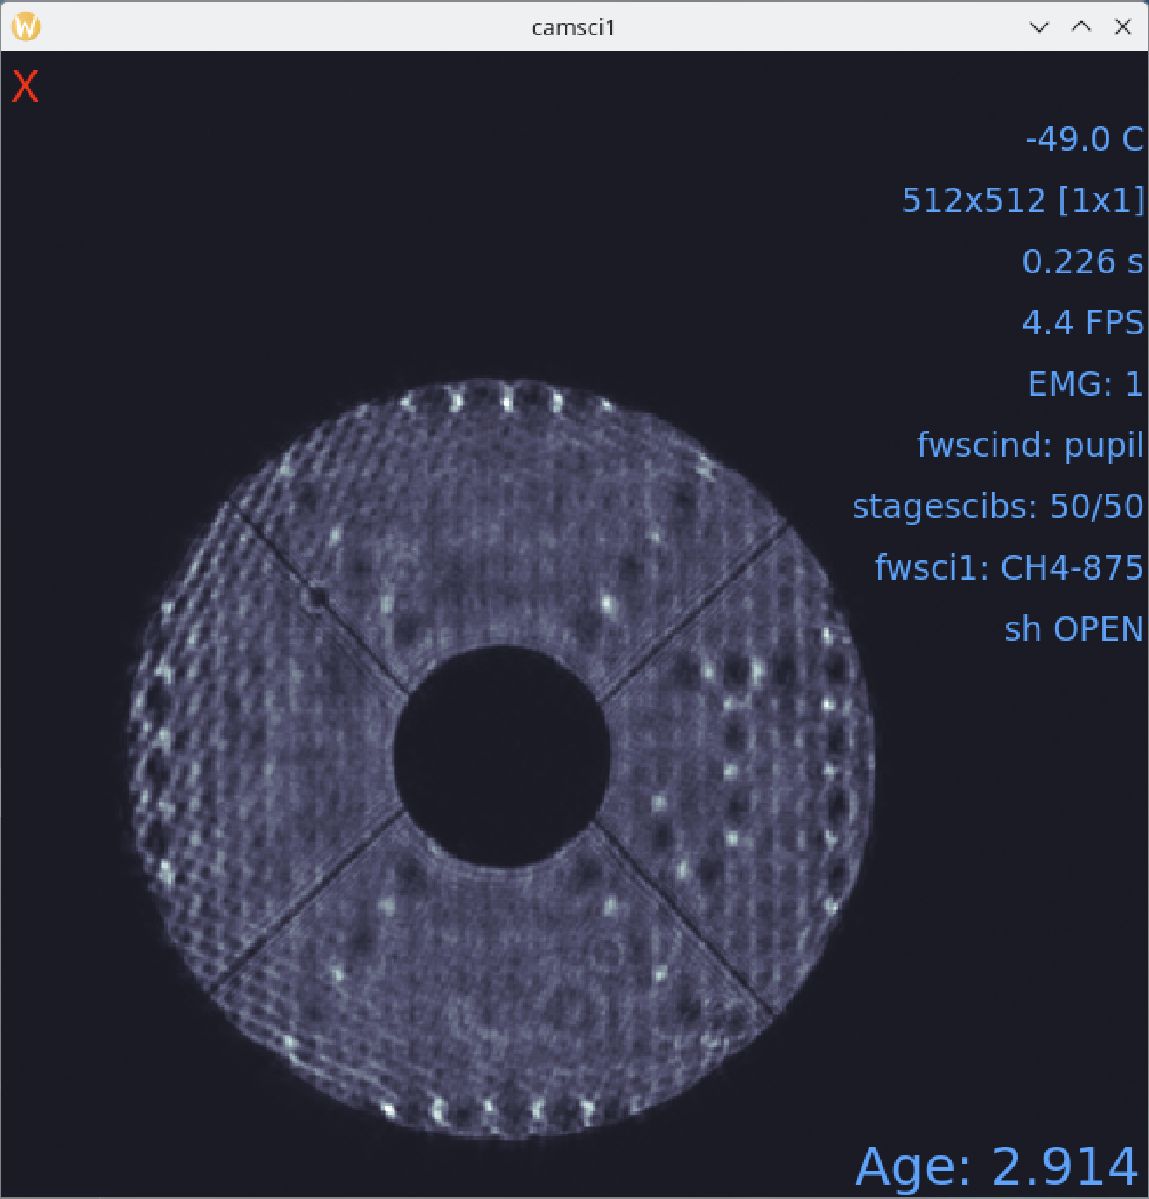
Move stagesci1 to preset test.
Put the test pattern on the
dmncpcqwith the Set Test button next to “NCPC” on the Pupil Alignment GUI.
Next, use the arrow buttons below TTM Peri to align the pupil on the NCPC DM.
After each move, wait a second or so for the Auto Alignment deltas to catch up.
Warning
As you are moving ‘TTM Peri’, monitor the CH1 [V] values just above the arrow buttons. If CH1 [V] reaches 150, then you have run out of range on TTM Peri. You will then need to offset the NCPC modal basis depending on the instrument’s internal temperature. You can offset the basis by running either shiftncpc warm or shiftncpc cold on exao5. Then, re-initialize dmncpc and re-set the flat. Now, verify that the numbers below CH1 [V] decrease when you click the “down” arrow button.
The following figure demonstrates what a good alignment looks like.
Once you are satisfied with the J-test alignment
Clear the J-test with the “zero test” button on the Pupil Alignment GUI
Return
stagesci1to thefpmpositionStop Auto Align and set offloading to 0 modes.
Focus Diversity Phase Retrieval (FDPR)
To further improve PSF quality, run focus diversity phase retrieval (FDPR) to derive a new non-common-path correction DM shape. When setting up in labmode before observations, it is important to match the state of the instrument during FDPR to the state that the instrument will be in on-sky. This includes:
use flipwfsf and/or the ND filters on fwtelsim to simulate a target of similar magnitude to the one you will be observing. In cursesINDI, you can navigate to strehl to see the estimated magnitude of the “star” you have created.
note: if your target is very faint, FDPR won’t be able to produce a good result. If you see this behavior, you will have to simulate a brighter target.
determine whether you will perform FDPR in CH4 or Halpha. The default is to use CH4 unless you are doing Halpha observations.
If you choose CH4, you will use camsci1 for FDPR.
If you choose Halpha, you will use camsci2 for FDPR.
Make sure the instrument is in the correct WFS beamsplitter and science beamsplitter configuration for your observation. Then, move stagesci1 or stagesci2 to the correct focus position for those settings, as well as for the coronagraph you plan on using.
Once you have confirmed the instrument is in the right state for FDPR, run the algorithm by doing the following:
Configure the filter wheel with the correct filter:
If using camsci1, set fwsci1 with the narrow-band methane filter CH4-875
If using camsci2, set fwsci2 to preset Halpha (not Halpha-narrow)
Define a ROI centered on the core of the PSF
for camsci1, the ROI should be 369x369
for camsci2, the ROI should be 256x256
If using a coronagraph, insert the coronagraph that you will be using now and move it out of the ROI (TODO: Include section for manual coronagraph alignment).
Adjust fwscind and exposure time as needed to have plenty (25000–40000) of counts in the peak of the PSF.
Close the shutter and take new darks. Then open the shutter.
Open a terminal on ICC and run the FDPR process.
for camsci1: fdpr2_close_loop fdpr2_dmncpc_camsci1_CH4
for camsci2: fdpr2_close_loop fdpr2_dmncpc_camsci2_Ha
On the lab source, the final strehl ratio should be close to 0.94. If the strehl is not quite there yet, you can run the process multiple times to improve it.
Once the strehl is satisfactory, save the flat with dm_save_flat ncpc -d fdpr.
Note
If setting up FDPR for a particular coronagraph configuration, you will want to name your DM flat accordingly (ie. dm_save_flat ncpc -d fdpr_lyotlg if using LyotLG).
On the dmncpc control GUI, zero all channels. Then, select the new flat from the drop-down menu and apply it.
Focal Plane and Coronagraph Alignment
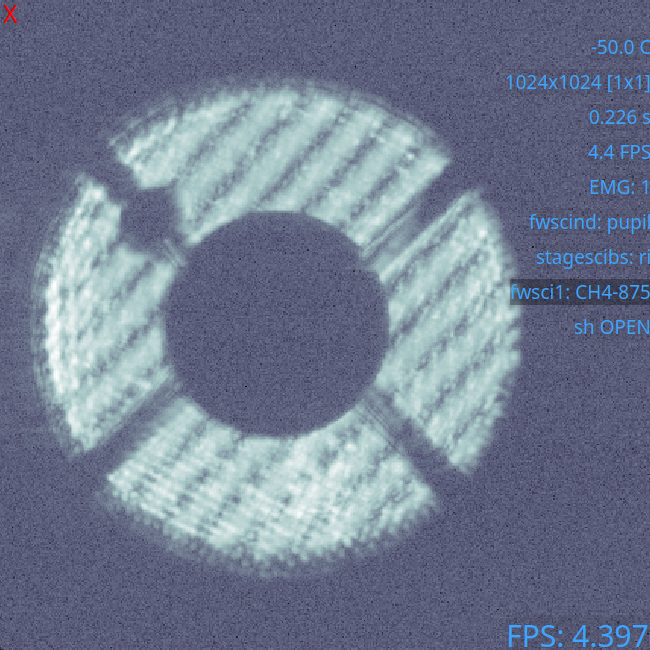
Automated Bump Mask and Lyot Stop Alignment
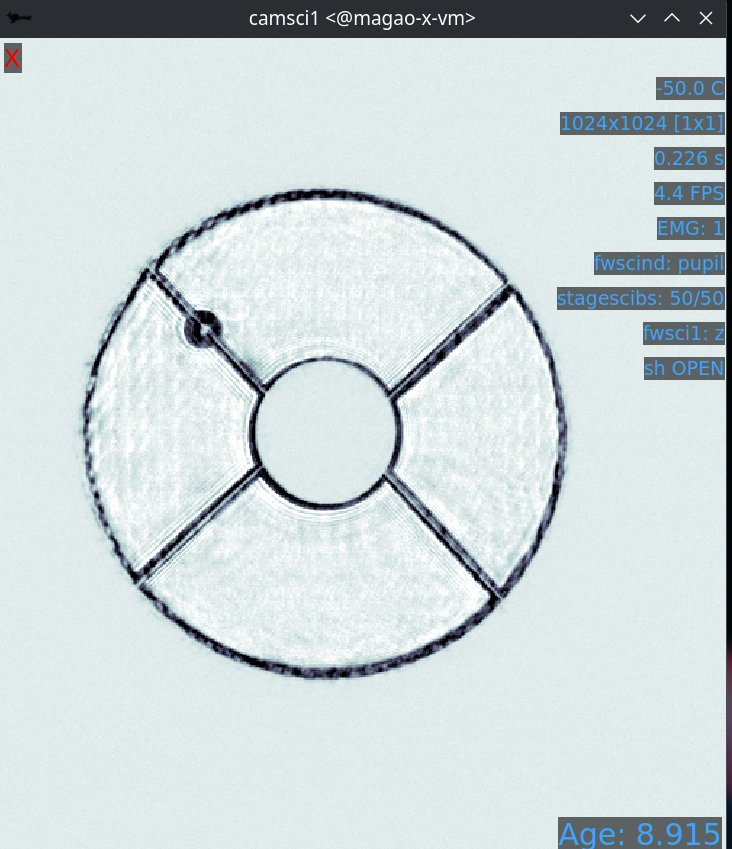
Put fwscind into pupil mode. Then, from the Coronagraph Alignment GUI, change fwpupil to bump-mask. Make sure that camsci1 is in the full ROI and that stagesci1 is at position 54.5.
Then, in cursesINDI, navigate to pupilCorAlign and toggle pupilCorAlign.state.centroid ON. A pattern should appear on dmncpc. Then, toggle pupilCorAlign.state.fwpupil ON. You should see the properties fwpupil.dx and fwpupil.dy start to change. Wait for these numbers to converge to a magnitude less than about 0.2, then toggle pupilCorAlign.state.idle ON to stop the process. The bump mask should now be aligned.
Note
The pattern on dmncpc sometimes freezes, and the app stops working. To fix this, go to a terminal on icc and, as xsup, do xctrl restart pupilCorAlign, and that should fix things. You do not have to redo the centroid step after the restart.
Now, use the Coronagraph Alignment GUI to put fwlyot into your desired Lyot stop, usually LyotLg1. Toggle pupilCorAlign.state.fwlyot to ON and watch the values under fwlyot.dx and fwlyot.dy. Once they converge to a magnitude <0.2, toggle pupilCorAlign.state.idle ON to stop the process. The Lyot stop should now be aligned.
Manual Bump-Mask Alignment
From the camsci1 gui, set
fwscind to pupil
stagesci1 to telsim
With the camsci1 shutter open, take a new dark. This will serve as the reference for alignment.
In the coronagraph alignment GUI: set fwpupil to bump-mask.
The camsci1 viewer will show the difference image, making it easier to align with the (now obscured) spider arms of the pupil.
Use the “Pupil Plane” directional buttons on the coronagraph alignment GUI to align the mask to the pupil.
Once the bump mask is aligned, change fwscind back to whatever you had before switching to pupil imaging mode.
Remember to close the shutter on camsci1 and take a new dark.
Manual Lyot Stop Alignment
From the camsci1 gui, set
fwscind to pupil
stagesci1 to telsim
With the camsci1 shutter open, take a new dark. This will serve as the reference for alignment.
In the coronagraph alignment GUI: set fwpupil to lyotlg or lyotsm (this will depend on your choice of coronagraph).
The camsci1 viewer will show the difference image, making it easier to align with the (now obscured) spider arms of the pupil.
Use the “Lyot Plane” directional buttons on the coronagraph alignment GUI to align the mask to the pupil.
TODO: Update the below figure:
Once the Lyot Stop is aligned, change fwscind back to whatever you had before switching to pupil imaging mode.
Remember to close the shutter on camsci1 and take a new dark.
PIAACMC Alignment
This alignment procedure assumes you have already completely aligned the system and that FDPR has been run. If that is not the case, please return to the standard alignment page.
- PIAA alignment has three major components, and will be aligned in these steps:
Bump mask alignmnet
Forward PIAA lenses
Complex focal plane mask alignment
Lyot stop alignment
Inverse PIAA lenses
Bump mask & Forward PIAA Lenses
The first set of PIAA optics are the forward lenses. It is recommended that you use the pupilCorAlign to align the bump mask before you introduce the first set of PIAA lenses. To align the bump mask, see “Automated Bump Mask and Lyot Stop Alignment”.
With the bump mask in, you are ready to align the forward PIAA lenses.
Stay in the pupil position on fwscind
Set the stagesci1 to 54.5 for best focus
Move stagepiaa to position 71.85
- In the pupil position:
Look for symmetry in the pupil plane. The given position should be good enough, but fine alignment could be needed.
For alignment, move
PIAAthe conjoined lens control, in Coronagraph Alignment GUI
- In the focal plane:
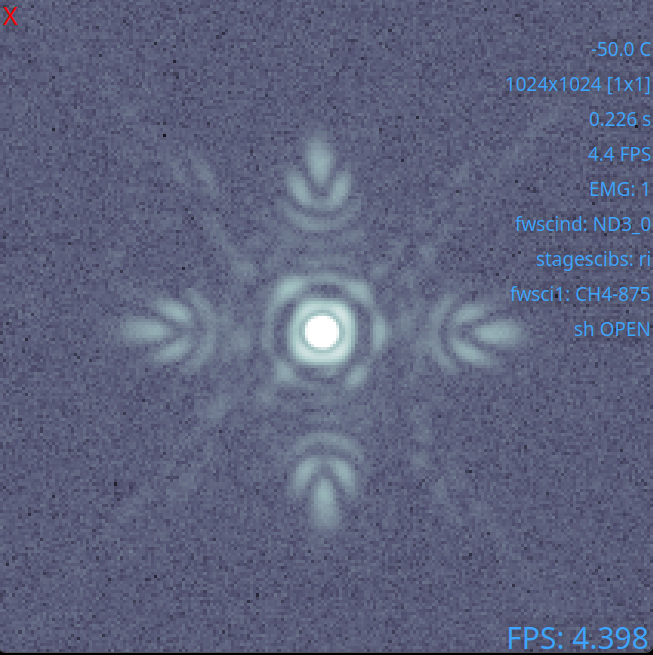
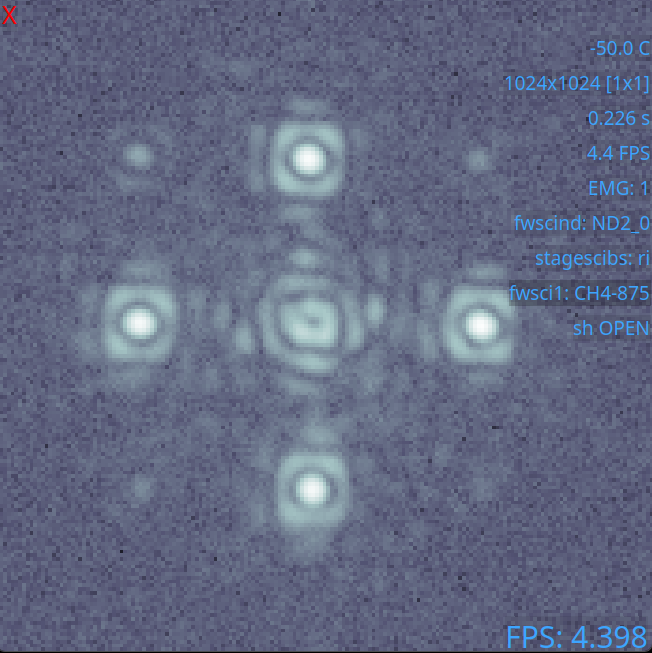
Put on narrow sparkles: separation 10 lambda/D, amp 0.05
Move
PIAA1until pineapples are symmetric, see figureThis operation moves PIAA1 relative to PIAA0, recommendation is to only move PIAA1 because it has more degrees of freedom in the control GUI
Central PSF should be symmetric, the “tails” of the pineapples should point towards the center

Note
The best position for stagepiaa has been seen to drift between MagAO-X setups. Double check this position between installs.
PIAACMC - aligning the coronagraph mask
- Once you are satisfied with your alignment of the first set of lenses, you are ready to introduce the complex focal plane mask. There are multiple prints on the substrate, and you will need to find the correct one.
Select cmc2 on fwfpm
Make sure camsci EMgain is set to 1
If using an ND filter, lower the ND to allow more light through
- You should see multiple diagonal rows of small dots. See figure.
the top row are tests
the second row are good z’ masks
the third and fourth rows don’t work well
Find the spot on the second tilted row, third spot from the left, numbered in figure.
- The spot should look centered on the PSF as shown below. See figure.
adjust ND as needed to see this properly
Lyot stop & Inverse PIAA Lenses
- Note that the addition of PIAA lenses means pupilCorAlign will no longer work as intended. The Lyot stop needs to aligned by hand, thankfully it is more forgiving than the bump mask.
Take a dark with the shutter open
Insert RLyotPIAA using the fwpupil
Align so that the mask is roughly centered on spiders
- Next, we add in the inverse PIAA lenses.
Take the inverse PIAA stage to position 61.4
- In the pupil position:
Again, look for symmetry. This position should be good enough but fine alignment could be needed.
For alignment, move with the
iPIAAcontrol, which moves the lenses togetherCheck to see that the iPIAA lenses have a centered distortion, see figure.
- In the focal plane:
shift to the narrowband 875 filter for undispersed sparkles
Put on narrow 10 lambda/D sparkles
- Move
iPIAA1lens in the coronagraph GUI until sparkles are symmetric like the forward PIAA it is recommended to just change the second lens, and leave alone
iPIAA0
- Move
Check closer (3 l/D) and further (20 l/D) sparkles to make sure alignment holds throughout the field
See figure for final alignment.
At this point you’re ready to dig a dark hole.