System Startup
Once the instrument has been unpacked and cabled, begin startup from System Powerup. Subsequent (nightly/daily) re-startup should generally begin from “Preparing For Operation” below.
The following assumes you’re sitting at the AOC workstation, but it
could be done anywhere with appropriate network tunnels. When one must
SSH to different hosts, the one where the command should be run will be
indicated before the prompt, like [xsup@exao1 ~]$ ls to run ls
on AOC in the ~ directory. (Don’t type the [host $] prompt, or
any comment lines starting with #.)
You should run these commands as the user xsup to ensure you can
read shared memory images (shmims) and ssh around to RTC and ICC. If
sitting at AOC, it’s therefore best to be logged into the desktop as
xsup.
If working remotely, note that steps in RTC and ICC power-up must be
done from firefox running on AOC. You can use ssh -X to accomplish
this with the right command line option in firefox, but using the x2go
virtual desktop is generally easier.
System Powerup
Start the MagAO-X processes on AOC (exao1) to get power control (see the guide to xctrl for more detail)
[xsup@exao1 ~]$ xctrl startup
# you'll see some output as the processes start, wait a little bit
[xsup@exao1 ~]$ xctrl status
# verify processes are all green/running
You should have power control now. AOC talks over the instrument internal LAN to network-controlled power strips (PDUs), which you can control over INDI via several different interfaces: sup, cursesINDI, or pwrGUI.
Since you’re sitting at AOC, it’s simplest to open pwrGUI. You should see switches appear.
[xsup@exao1 ~]$ pwrGUI &
# window should pop open with switches
The following devices on the ninja tab of pwrGUI should be powered up, and never powered off (unless you know what you’re doing):
pdu0.dcpwrpdu3.blowerpdu3.rackfanspdu3.instCoolusbdu0.rhtweeterusbdu1.rhncpc
The
camflowfsandcamllowfspower should also be turned on (at least long enough to follow the ICC Power-On steps below).RTC Power-On
Critical: Ensure that
instCoolis powered on to provide liquid cooling to the RTC.Using the pwrGUI ninja tab, power on
pdu0.comprtcUsing Firefox on AOC, navigate to http://192.168.0.170/ (or use the “Moxa DIO” bookmark)
Log in (if required); password provided to those who need it
In the left menu, select
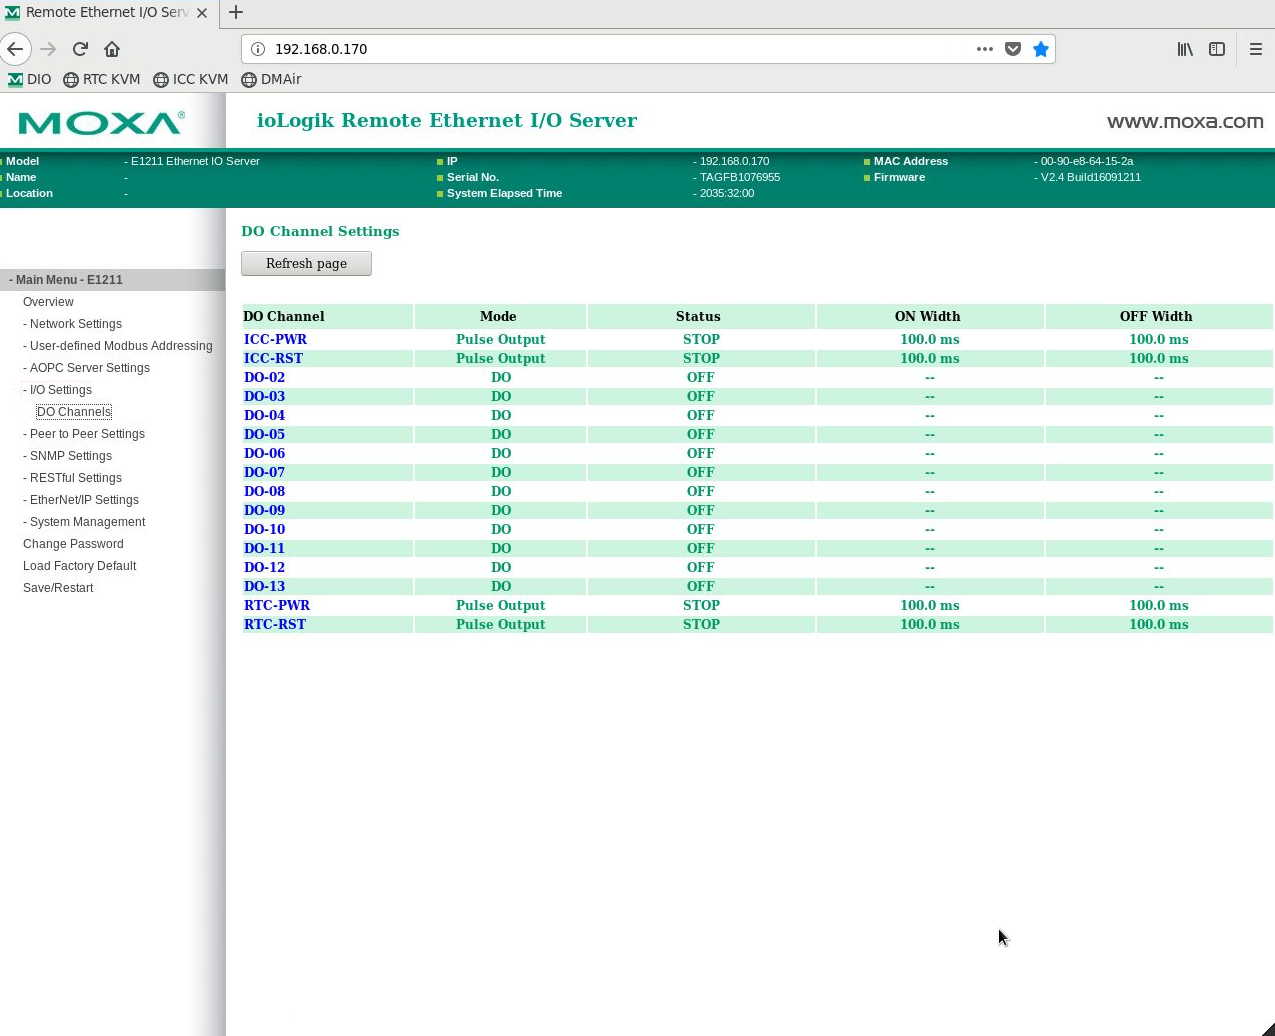
In the main frame, click on RTC-PWR, which will open a new window:
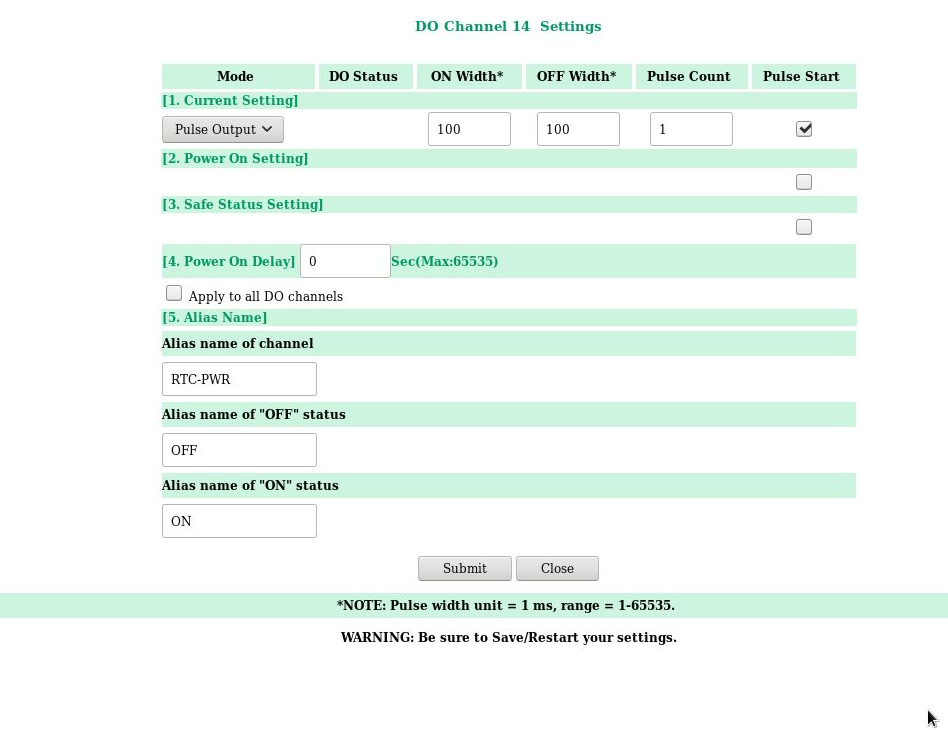
Under 1. Current Setting, ensure that Pulse Output is selected, and check the box under Pulse Start. Then press the Submit button at the bottom. This remotely presses the ATX power button on the RTC.
Wait for RTC to come up, and verify that you can ssh in
Note
If connecting from off-site, you can set up a tunnel to the Moxa DIO device by running:
ssh -L8787:192.168.0.170:80 YOURUSERNAME@exao1.magao-x.org
(substituting your MagAO-X username appropriately). The interface is then available at http://localhost:8787/
ICC Power-On
Critical: Ensure that
instCoolis powered on to provide liquid cooling to the ICC.Using the pwrGUI ninja tab, power on
pdu0.compiccUsing Firefox on AOC, navigate to http://192.168.0.170/ (or use the “Moxa DIO” bookmark)
Log in (if required); password provided to those who need it
In the left menu, select
In the main frame, click on ICC-PWR, which will open a new window similar to the one for RTC-PWR.
Under 1. Current Setting, ensure that Pulse Output is selected, and check the box under Pulse Start. Then press the Submit button at the bottom. This remotely presses the ATX power button on the ICC.
Wait for it to come up, and verify you can ssh in
Ensure the LOWFS camera driver loads by running
sudo modprobe pvcam_pcie(we plan to automate this eventually, but it’s always safe to do again)Optional: If you don’t plan to use the LOWFS cameras any time soon, you can power them back off. See Missing camflows or camllowfs for hot-plugging instructions if you need to power them on later.
Fresh reboot CACAO startup
RTC (exao2)
Connect to RTC as xsup (i.e. ssh rtc if you’re logged in as xsup at the operator workstation).
Start the CACAO processes:
[xsup@exao2] $ cacao-startup
Success looks like SCRIPT /usr/local/milk/bin/cacao-setup Success after many screenfuls of text.
Use milk-fpsCTRL to verify that both dmch2disp-00 and dmch2disp-01 are running.
The second column of numbers (color-coded red or green) indicate the number of errors. If red (i.e. > 0 errors),
the processes won’t start and the errors should be examined.
ICC (exao3)
Connect to RTC as xsup (i.e. ssh rtc if you’re logged in as xsup at the operator workstation).
Start the CACAO processes:
[xsup@exao2] $ cacao-startup
Success looks like SCRIPT /usr/local/milk/bin/cacao-setup Success after many screenfuls of text.
Use milk-fpsCTRL on ICC to verify that dmch2disp-02 is running.
Fresh reboot MagAO-X startup
You already started MagAO-X software on AOC (exao1) to control power, but the hardware control processes on RTC (exao2) and ICC (exao3) have to be started.
Connect to RTC as xsup (i.e. ssh rtc from the operator workstation) and run xctrl startup.
After it completes, use xctrl status to verify that processes have started (i.e. are running and not dead).
Repeat these steps on ICC (ssh icc, xctrl startup, xctrl status).
Investigate any processes that failed to start by using logdump -n 1 {name} to see the log and/or tmux a -t {name} to connect to their tmux session.
GUI Setup
To setup the GUIs on exao1 (AOC) as user
xsup, run the command:[xsup@exao1 ~]$ magaox_guis.sh
Some windows will need to be rearranged. The DM displays should self-normalize. If they do not, the following command should fix it:
[xsup@exao1 ~]$ bash dmnorm.sh tweeter &
where you replace tweeter with either woofer or ncpc as necessary.
Set up a cursesINDI terminal.
Preparing for Operations
You can now proceed to Daily Startup to prepare the instrument for operation.